Best Eyeliner Styles for Every Eye Shape
We have all spent far too long in front of the vanity mirror trying to get our wings to match, only to end up with a thick black mess. It is a common struggle that usually stems from following a general tutorial that doesn’t account for your unique facial anatomy.
Understanding your specific eye shape is the secret to making your makeup look professional and polished every single morning. This guide helps you identify your features and choose the most flattering strokes to enhance your natural beauty.
Whether you have hooded lids that hide your hard work or round eyes that you want to elongate, we have specific techniques for you. Let’s find the signature stroke that makes your eyes pop without the morning stress.
Identifying Your Natural Eye Shape
Before you pick up your favorite liquid liner, you need to know what you are working with. Stand in front of a mirror in natural light and look straight ahead with a neutral expression.
Check if you can see a crease and how much of your eyelid is visible when your eyes are open. Also, look at the outer corners to see if they turn upward, downward, or stay neutral.
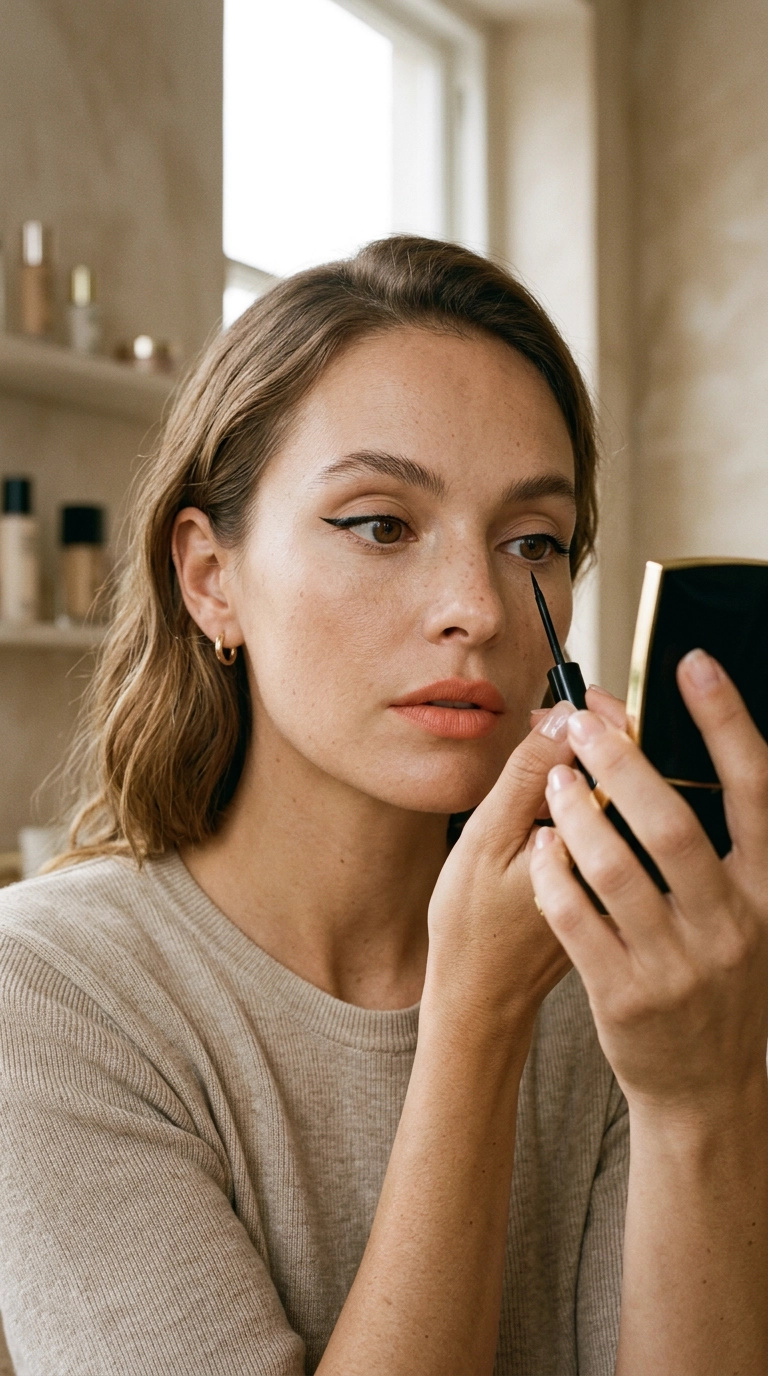
The Mirror Test
Look at the white part of your eye. If you can see white below the iris, you likely have round eyes.
If your lid covers part of the iris and the eye is longer than it is tall, you have an almond shape. Those with skin that hangs over the crease have hooded eyes.
Identifying these small details changes how you approach your wing angle and thickness. It is the first step toward a more symmetrical and flattering look.
Mastering the Bat-Wing for Hooded Eyes
Hooded eyes are beautiful but can be tricky because the skin of the brow bone often covers the mobile lid. Traditional wings often look “broken” or disappear entirely when the eye is open.
The bat-wing technique solves this by creating a small notch in the liner. When your eye is closed, it looks like a lightning bolt or a bat wing, but when open, it appears as a perfectly straight line.
Use a fine-tip waterproof liquid pen for this style to prevent transferring onto the upper lid. Focus on keeping the inner half of the lash line extremely thin to maximize visible lid space.
Step-by-Step Bat-Wing
- Look straight into the mirror with your eyes open and relaxed.
- Mark the outer point of your wing while your eyes are open to ensure it doesn’t get lost in the fold.
- Connect that point back to your lash line, creating a small “hook” shape over the crease.
- Fill in the gap and keep the line across the rest of the lid as close to the lashes as possible.
Elongating Round Eyes for a Snatched Look
Round eyes are naturally bright and alert, but many people want to add a bit of sultry length. The goal here is to create a more horizontal shape rather than emphasizing the height of the eye.
Avoid thick lines in the center of the eye, as this makes them appear even rounder. Instead, start your liner about a third of the way from the inner corner and build thickness toward the outer edge.
Draw your wing out horizontally rather than upward. This “sideways” flick creates an almond-like illusion that looks very modern and chic.
Top Tips for Round Eyes
Use a dark brown or charcoal kohl pencil for a softer, smudged effect. Smudging the outer third of the lower lash line can also help pull the eye outward.
Always keep the inner corners bright and free of heavy dark pigments. This maintains the natural sparkle of round eyes while adding a sophisticated edge.
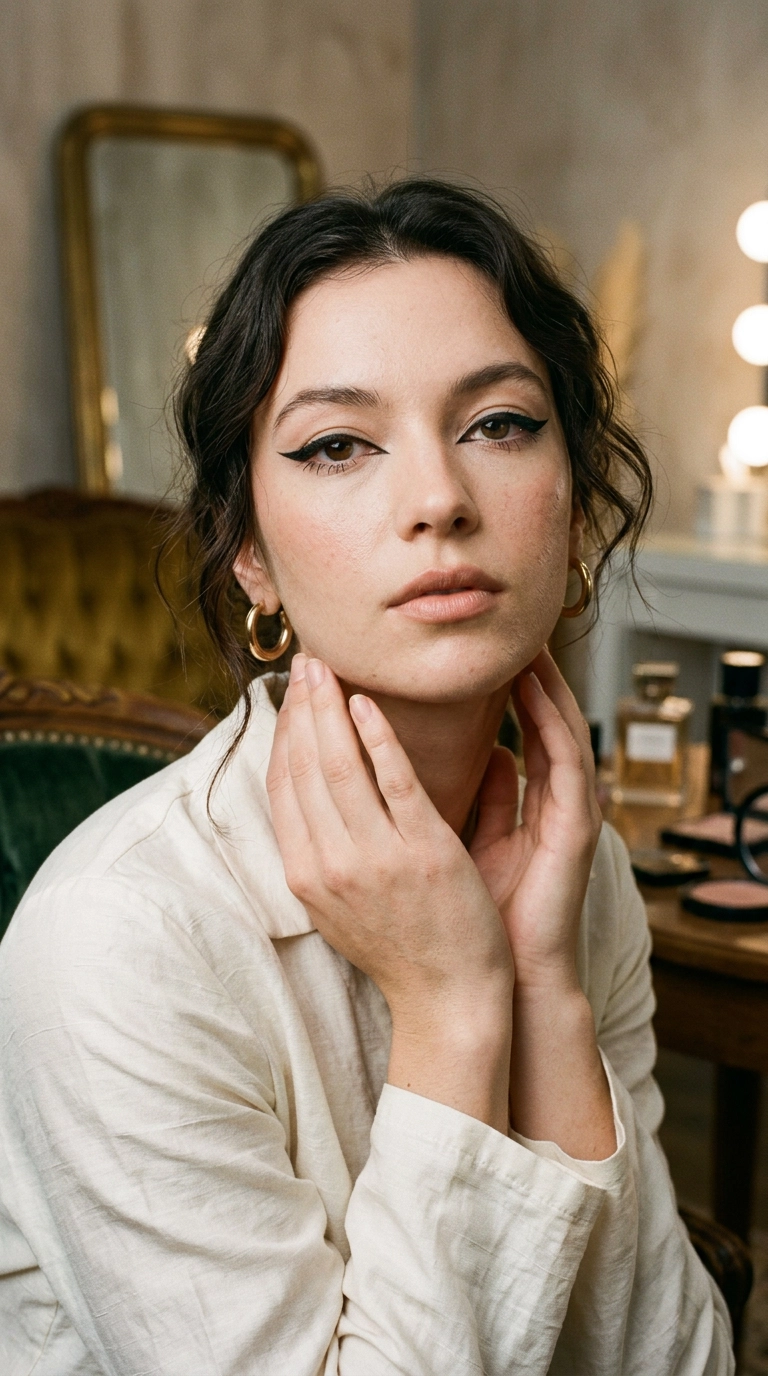
Classic Flicks for Almond Eyes

Almond eyes are often considered the most versatile shape for makeup. They are naturally balanced with a slight lift at the outer corners, making them the perfect canvas for almost any style.
A classic cat-eye looks incredible on almond shapes because it follows the natural curve of the eye. You can go as thin or as thick as you like depending on the occasion.
Try a gel pot and a slanted brush for maximum control and a rich, matte finish. This allows you to build a sturdy wing that stays sharp all day long.
Enhancing the Almond Curve
Follow the lower lash line’s upward trajectory when deciding on the angle of your wing. This ensures the liner looks like a natural extension of your eye shape.
Add a tiny bit of liner to the inner “V” of your eye for a more feline, exotic appearance. This “inner corner flick” is a favorite among celebrity makeup artists for red-carpet looks.
Graphic Precision for Monolids
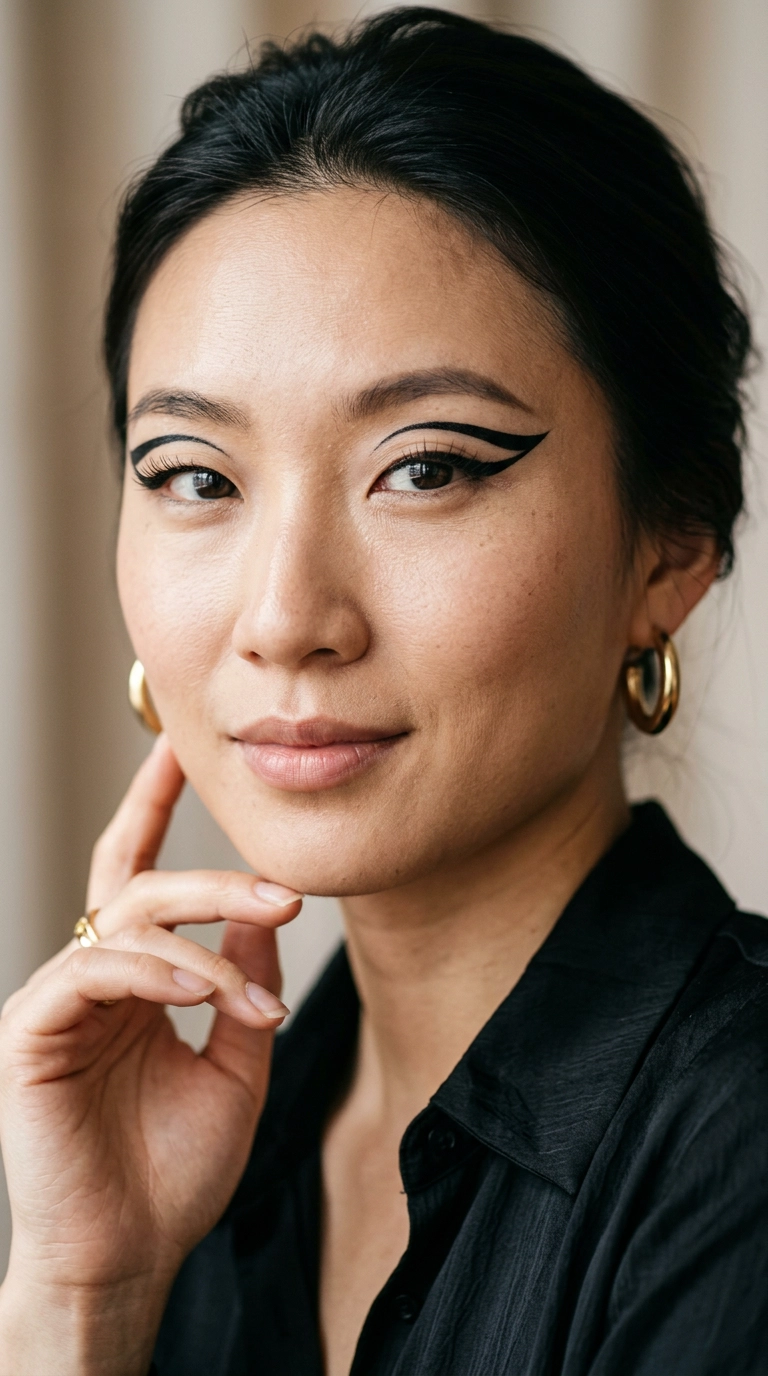
Monolids offer a flat surface that is essentially a blank canvas for creative and graphic liner styles. Since there is no crease to work around, you can experiment with height and bold shapes.
One effective technique is to draw a very thick line that is visible when the eye is open. Alternatively, the “floating liner” look works beautifully here, where a line is drawn above the lash line on the brow bone.
Gel liners are often best for monolids because they dry down quickly and resist smudging. Look for formulas that are specifically labeled as smudge-proof or long-wear.
The Vertical Lift Technique
- Apply your liner with your eyes open to see exactly where the pigment will sit.
- Don’t be afraid to bring the liner high up onto the lid; it will look balanced once the eye is open.
- Use a flat-top brush to press dark shadow over your liner to set it and prevent any transfer.
Lifting Downturned Eyes
Downturned eyes have a slight droop at the outer corners, which can sometimes make the face look tired. The right eyeliner acts like an instant mini-lift for the entire face.
The secret is to start your wing much earlier than you think. Don’t follow the lash line all the way to the very end; instead, start your upward flick a few millimeters before the corner.
Aim for a 45-degree angle pointing toward the tail of your eyebrow. This creates an optical illusion that pulls the corners of the eyes upward and outward.
Mastering the Lift
Avoid lining the bottom lash line with dark colors, as this can pull the eye down further. If you want definition on the bottom, use a nude or champagne pencil in the waterline.
Keep the wing relatively short and sharp. A long, heavy wing can sometimes weigh the eye down, so a “kitten flick” is often the most flattering choice.
Balancing Upturned Eyes
Upturned eyes have a natural “cat-eye” lift already built into their shape. While many people envy this, it can sometimes make the eyes look smaller or disproportionate if not lined correctly.
To balance this shape, focus on adding a bit more weight to the outer lower lash line. This anchors the eye and makes the natural lift look more intentional and framed.
For the upper lid, a thin line that stays consistent in thickness from the inner corner to the outer corner works best. You don’t need a massive wing because your eyes already have that upward energy.
Symmetry and Balance
Try using a dark shadow and a smudger brush instead of a harsh liquid line. This softens the natural “cat-eye” and creates a more romantic, dreamy look.
A small, straight flick that doesn’t curve too much will complement the natural angle of your eyes. Stick to deep espresso or soft black tones for a sophisticated finish.
Choosing Your Tools
The tool you choose is just as important as the technique you use. Different eye shapes often benefit from different applicator types and formulas.
| Eye Shape | Recommended Tool | Main Benefit |
|---|---|---|
| Hooded | Fine-tip Liquid Pen | Prevents lid transfer |
| Almond | Gel Pot & Brush | Allows for custom thickness |
| Round | Kohl Pencil | Easy to smudge for length |
| Monolid | Waterproof Gel Pen | Smudge-proof all day |
Keep a pack of pointed cotton swabs and some micellar water nearby at all times. Even the pros make mistakes, and a quick clean-up can turn a shaky line into a razor-sharp wing.
If you are a beginner, try “mapping” your wing with a light brown eyeshadow first. Once you are happy with the shape, simply trace over it with your darker liner for a perfect result.
Common Mistakes to Avoid
Avoid pulling your skin taut while drawing your liner. When you release the skin, the shape will snap back and often look distorted or wrinkled.
Don’t forget to look straight ahead. If you only look down into a hand mirror, you won’t see how the liner interacts with your eye folds when you are talking to people.
Ensure your liner is dry before you look up or blink fully. This is especially true for hooded eyes or monolids where the skin touches itself frequently.
Finding Your Signature Look
Makeup is an art, not a science, and these rules are meant to be a helpful starting point rather than strict requirements. The most important thing is that you feel confident and comfortable in your own skin.
Take some time on a Sunday afternoon to practice these different techniques without the pressure of having to go anywhere. You might find that a hybrid of two styles works best for your specific features.
With a little bit of patience and the right knowledge of your eye shape, you can master the perfect wing. Happy lining, and enjoy showcasing your beautiful eyes to the world.