How to Style a Wolf Cut with a Flat Iron for a Polished Shag?

The wolf cut has taken the beauty world by storm, blending the vintage shag with a modern mullet for a look that is unapologetically bold. While the cut relies on heavy layering and face-framing pieces, the way you style those layers determines whether you look chic or just messy. Using a flat iron is the most effective way to define these textures without needing a professional blowout every morning.
You might feel intimidated by all those layers, but a straightener offers more control than a round brush ever could. It allows you to flip the ends out, tuck the face-framing pieces in, and create that signature “S-wave” that makes the wolf cut so iconic. Whether your hair is fine and flat or thick and rebellious, these techniques will help you master the silhouette in minutes.
This guide breaks down the process into simple, manageable steps that focus on volume, direction, and grit. We will cover everything from heat protection to the final mist of texture spray, ensuring your hair stays bouncy and defined throughout the day. Let’s get into the specifics of making your wolf cut look its absolute best with just one tool.
Prepare Your Hair for Heat Styling
Before you even touch your flat iron, your hair needs to be completely dry. Using a straightener on damp hair causes the water to turn into steam inside the hair shaft, which leads to long-term damage and frizz. If you have the time, air-drying can help preserve your natural texture, but a quick rough-dry with a blow dryer will give you more base volume at the roots.
Always apply a high-quality heat protectant while your hair is still damp. This creates a barrier that prevents the plates from scorching the cuticle and keeps your layers looking shiny rather than fried. Look for a spray that also offers a bit of hold to help your curls and flips last longer.
Once your hair is dry, brush through it with a wide-tooth comb to remove any tangles. This ensures the flat iron glides smoothly over each layer without snagging. If your hair is particularly fine, you might want to add a volumizing mousse to the roots before drying to give the flat iron more “grip” later on.
The Sectioning Strategy for Layered Hair
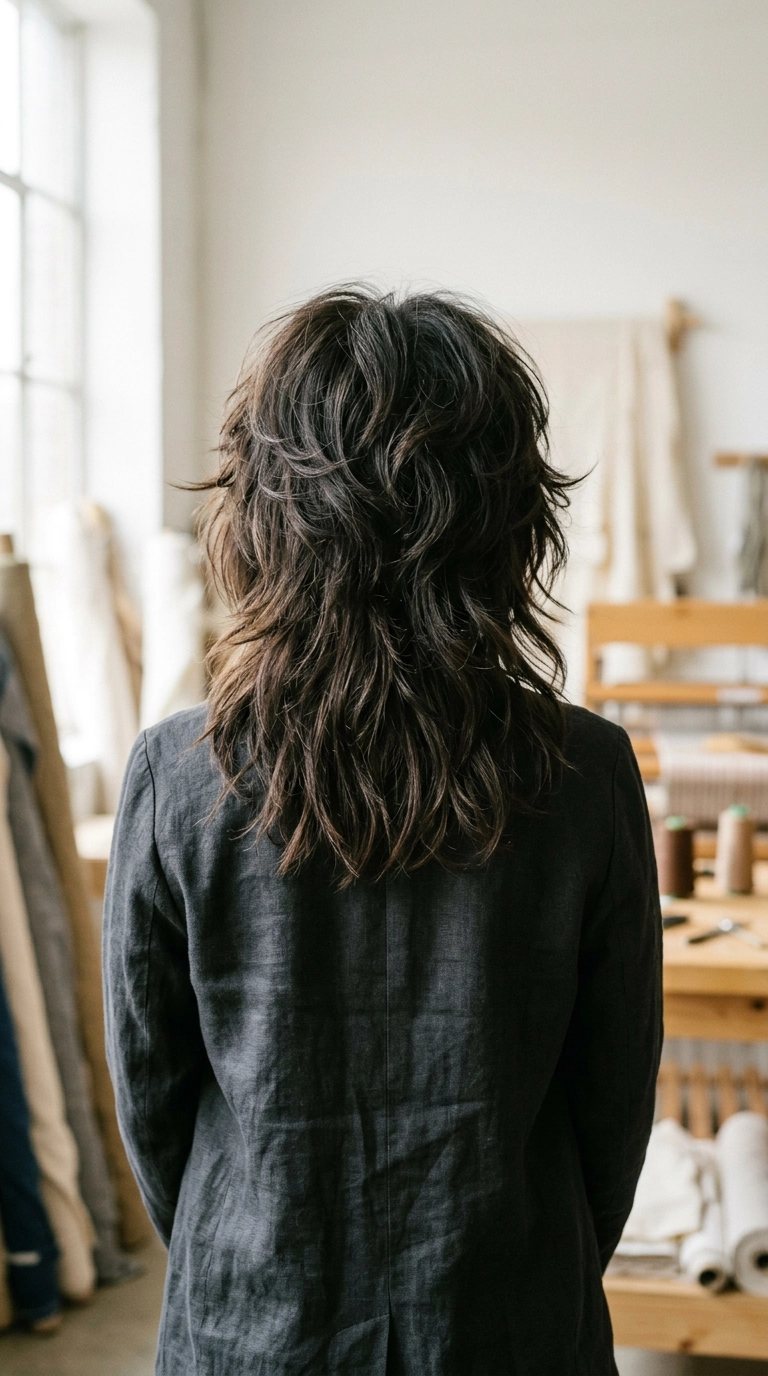
The wolf cut is all about the layers, so you cannot style it all in one go. You need to work in horizontal sections to ensure every piece gets the attention it deserves. Start by clipping up the top half of your hair, leaving the longest layers at the nape of your neck free.
Working from the bottom up allows you to build a foundation of volume. If you start at the top, the weight of the upper layers might squash the styling you do underneath. Use professional-grade clips to keep the sections tidy and prevent hair from falling back into your workspace.
Refer to the table below to determine how many sections you should use based on your hair density:
| Hair Density | Number of Sections | Primary Goal |
|---|---|---|
| Fine / Thin | 2 – 3 Sections | Adding lift and movement |
| Medium | 3 – 4 Sections | Defining layers and shape |
| Thick / Coarse | 5+ Sections | Reducing bulk and taming frizz |
Mastering the Flip and the S-Wave
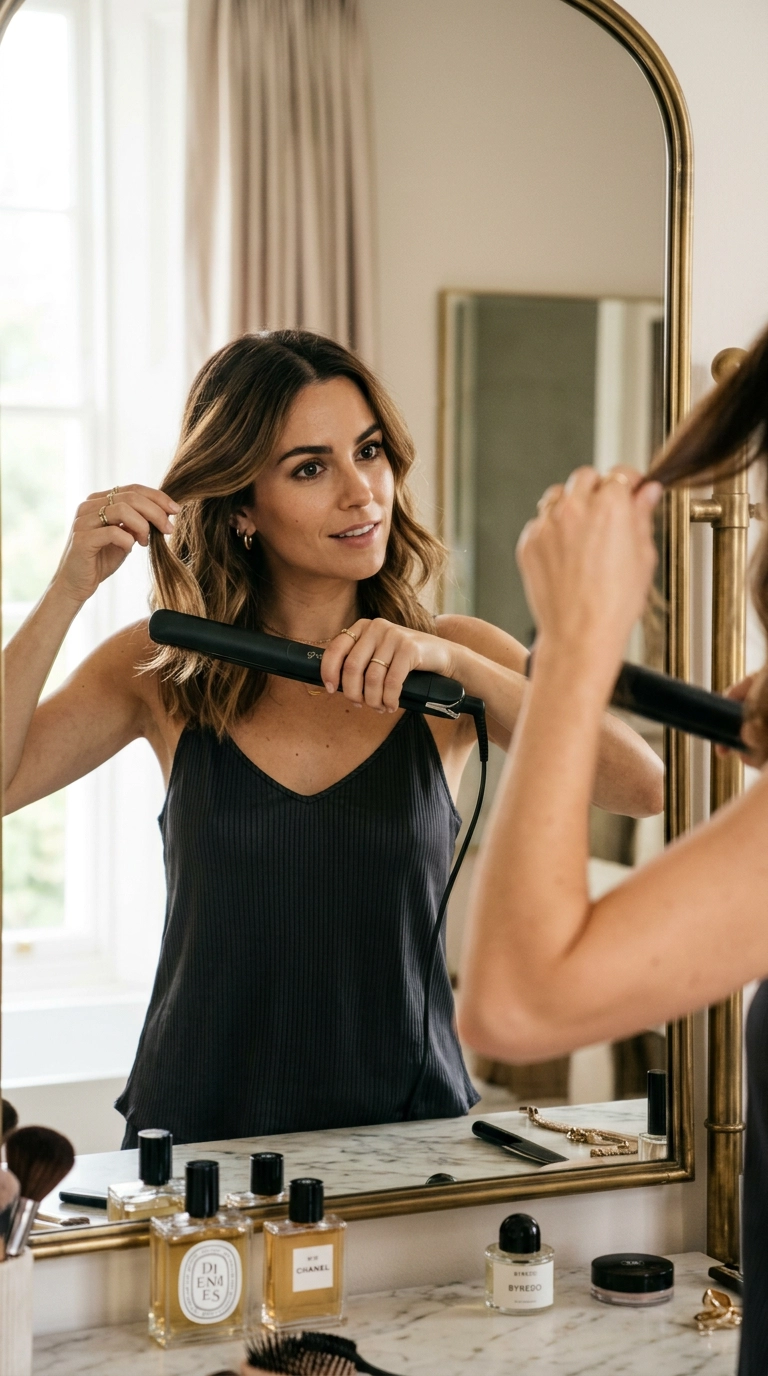
The secret to a great wolf cut is the direction of the ends. For the bottom layers, you want to “flip” them outwards. Take a one-inch section of hair, clamp the iron mid-way down, and as you reach the ends, rotate your wrist 180 degrees away from your face. This creates that shaggy, flared-out look at the shoulders.
For the middle layers, the “S-wave” technique adds the necessary texture. Instead of a continuous pull, clamp the iron and rotate it forward, slide down an inch, then rotate it backward. This creates a soft, zigzag wave that looks lived-in and effortless rather than like a pageant curl. This movement mimics natural hair patterns and keeps the cut from looking too stiff.
Keep your movements fluid. If you hold the iron in one spot for too long, you will end up with a harsh “dent” in your hair. If this happens, wait for the section to cool, then run the iron over it once to smooth it out before trying again. Practice makes perfect when it comes to the wrist rotation.
Creating Volume and Root Lift
A flat wolf cut is just a mullet; you need height at the crown to make it look intentional. To achieve this with a flat iron, take the very top sections of your hair and pull them straight up toward the ceiling. Clamp the iron as close to the root as possible and pull upward in a curved motion.
This “over-direction” creates a natural lift that lasts much longer than just hairspray alone. Once you have pulled the iron through, hold the section of hair in your hand for a few seconds while it cools. This “sets” the volume in place, giving you that bouncy, airy feel that is central to the wolf cut aesthetic.
Avoid using too much heavy product at the roots, as this can weigh the hair down. Instead, rely on the heat of the iron to create the shape. If you need extra help, a tiny puff of styling powder at the crown can provide extra grit and hold without the greasiness of a wax or pomade.
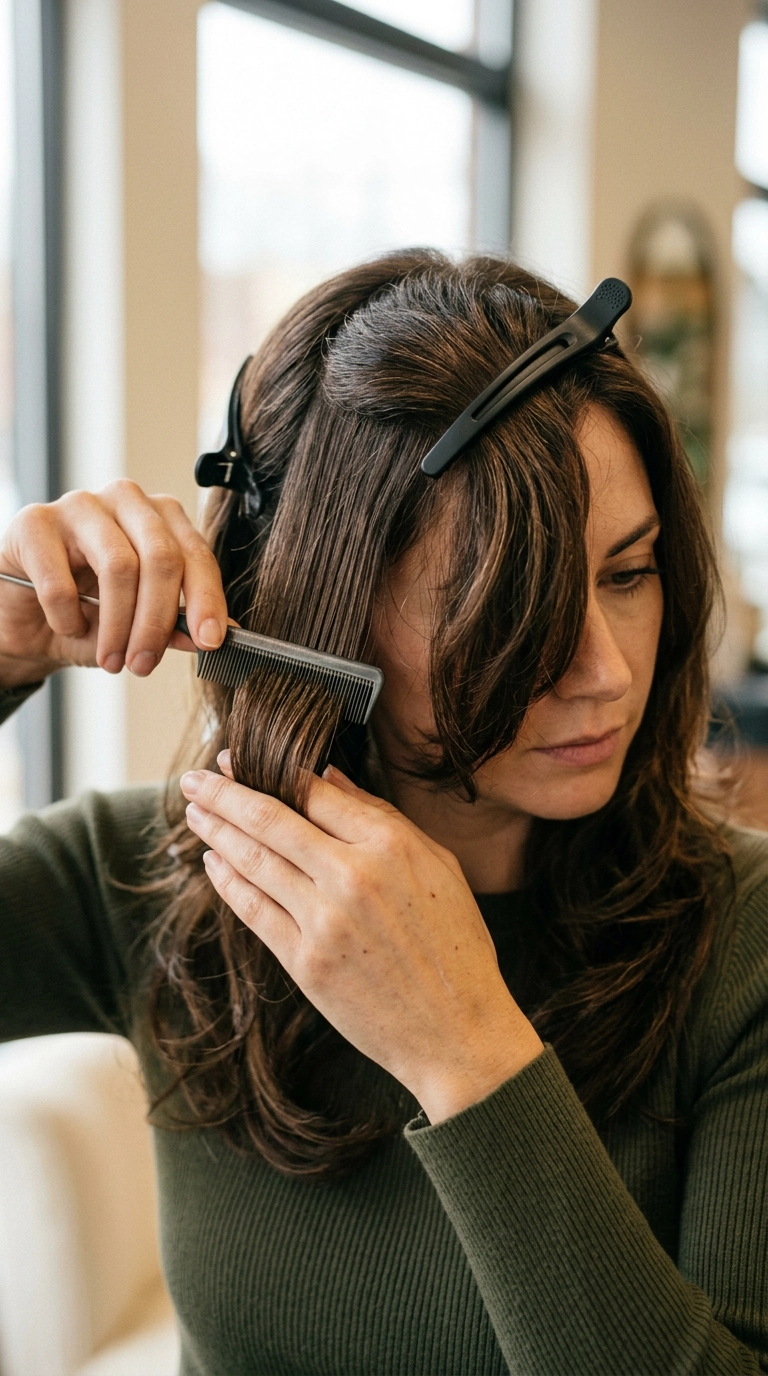
Styling the Face-Framing Layers and Bangs

The face-framing pieces are the most important part of the cut. For curtain bangs, clamp the iron at the root and pull away from your face in a “C” shape. This allows the bangs to sweep elegantly to the sides, opening up your face and highlighting your cheekbones.
The shorter layers around your ears should usually be tucked inward toward the face. This creates a beautiful contrast with the flared-out layers at the bottom. By alternating the direction of the curls—inward for the face-framing pieces and outward for the perimeter—you create a dynamic, multi-dimensional look.
Be very gentle with the heat on these front sections. The hair around the face is often finer and more prone to breakage. Use a lower temperature setting on your iron for these pieces to maintain their health and shine. A quick pass is usually all you need to set the shape.
Essential Finishing Products for Grit and Shine
Once you have finished styling with the flat iron, the hair might look a bit too “done.” To get that authentic wolf cut vibe, you need to break up the sections. Flip your head upside down and give it a gentle shake. This separates the waves and allows the layers to mingle naturally.
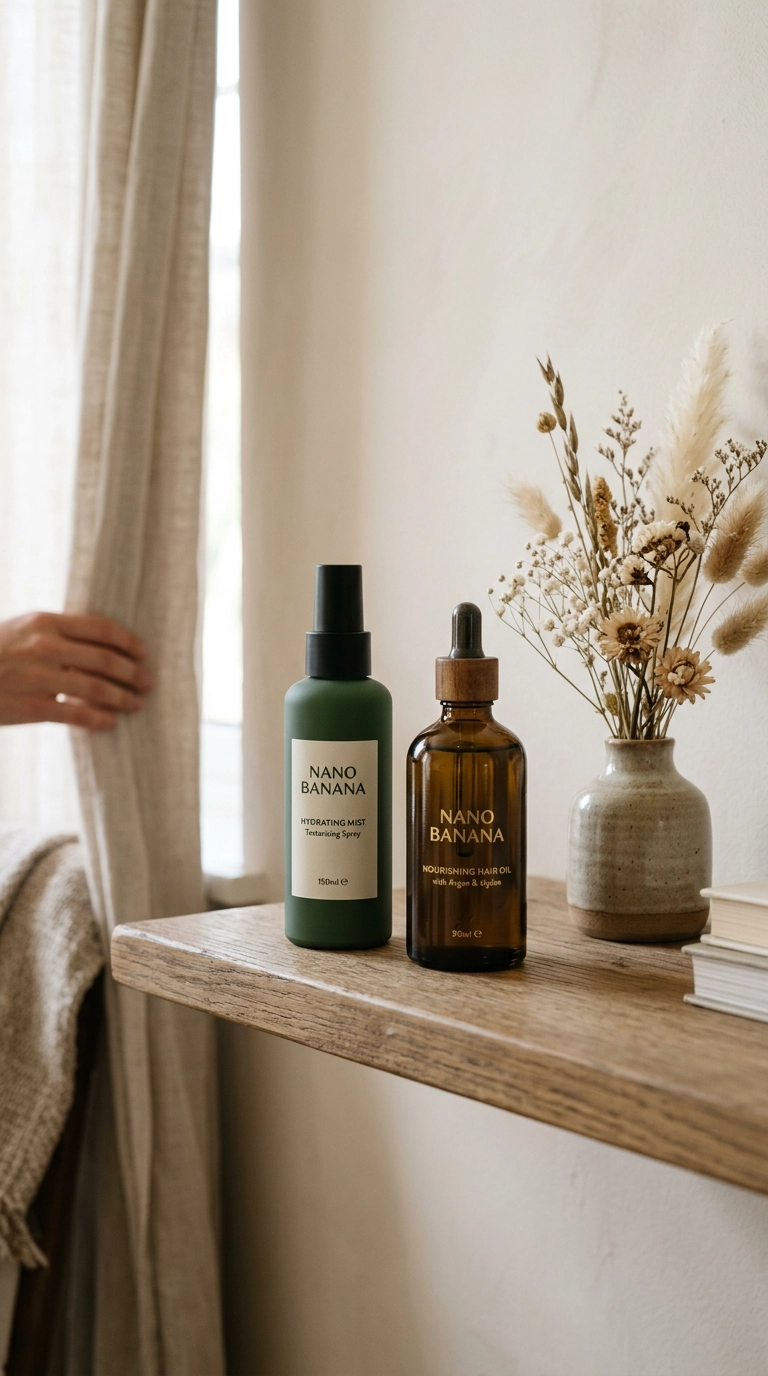
A dry texture spray is non-negotiable for this style. Mist it through the mid-lengths and ends to add volume and a matte, lived-in finish. Unlike hairspray, texture spray doesn’t make the hair crunchy, so you can still run your fingers through it without ruining the shape.
- Dry Texture Spray: Adds volume and that “undone” cool-girl grit.
- Lightweight Hair Oil: Apply a tiny drop to the very ends to prevent them from looking dry or frayed.
- Finishing Mist: Use a flexible hold spray to keep the volume at the crown from falling flat.
- Sea Salt Spray: Great for those with fine hair who need extra texture before styling.
Maintenance and Troubleshooting

If your hair feels too “flippy” or like a 70s TV star, you can easily tone it down. Use the flat iron to gently smooth the very ends of the outward flips so they look more like soft points rather than round curls. The goal is a balance between structure and chaos.
For those with naturally curly hair, you might find that the humidity ruins your flat iron work. In this case, use a humidity-resistant finishing spray as your final step. This seals the cuticle and prevents moisture from entering the hair shaft and causing it to revert to its natural state.
Remember that the wolf cut looks better on the second day. The natural oils from your scalp add a bit of weight and “piecey-ness” to the layers that you just can’t get with freshly washed hair. Simply touch up the face-framing pieces with your flat iron in the morning, add a bit of dry shampoo, and you are ready to go.
Frequently Asked Questions
What temperature should I use on my flat iron?
For fine or damaged hair, stay between 300°F and 350°F. If you have thick or coarse hair, you can go up to 380°F, but rarely should you ever need to go higher, as it risks significant heat damage.
Can I style a wolf cut with a wide-plate straightener?
It is possible, but a one-inch plate is much better for the wolf cut. The smaller plates allow you to get closer to the root and provide more precision for those delicate face-framing flips.
How often should I wash my wolf cut?
Try to limit washing to 2 or 3 times a week. This cut thrives on texture, and slightly unwashed hair holds the shape of the flat iron styling much better than slippery, clean hair.
Does this work on short wolf cuts?
Absolutely. For shorter versions, focus more on the root lift and the “flicking” of the very ends. You may not have enough length for the S-wave, but the volume at the top will still give you the desired silhouette.
Bringing Your Look Together
Mastering the wolf cut with a flat iron is all about embracing the layers and working with the natural movement of your hair. By using the right techniques—like over-directing for volume and flipping the ends for that shaggy edge—you can turn a high-maintenance cut into an easy daily routine. Don’t be afraid to experiment with the direction of your waves until you find the shape that best flatters your face. With a little practice and the right products, your wolf cut will remain your favorite style for seasons to come.