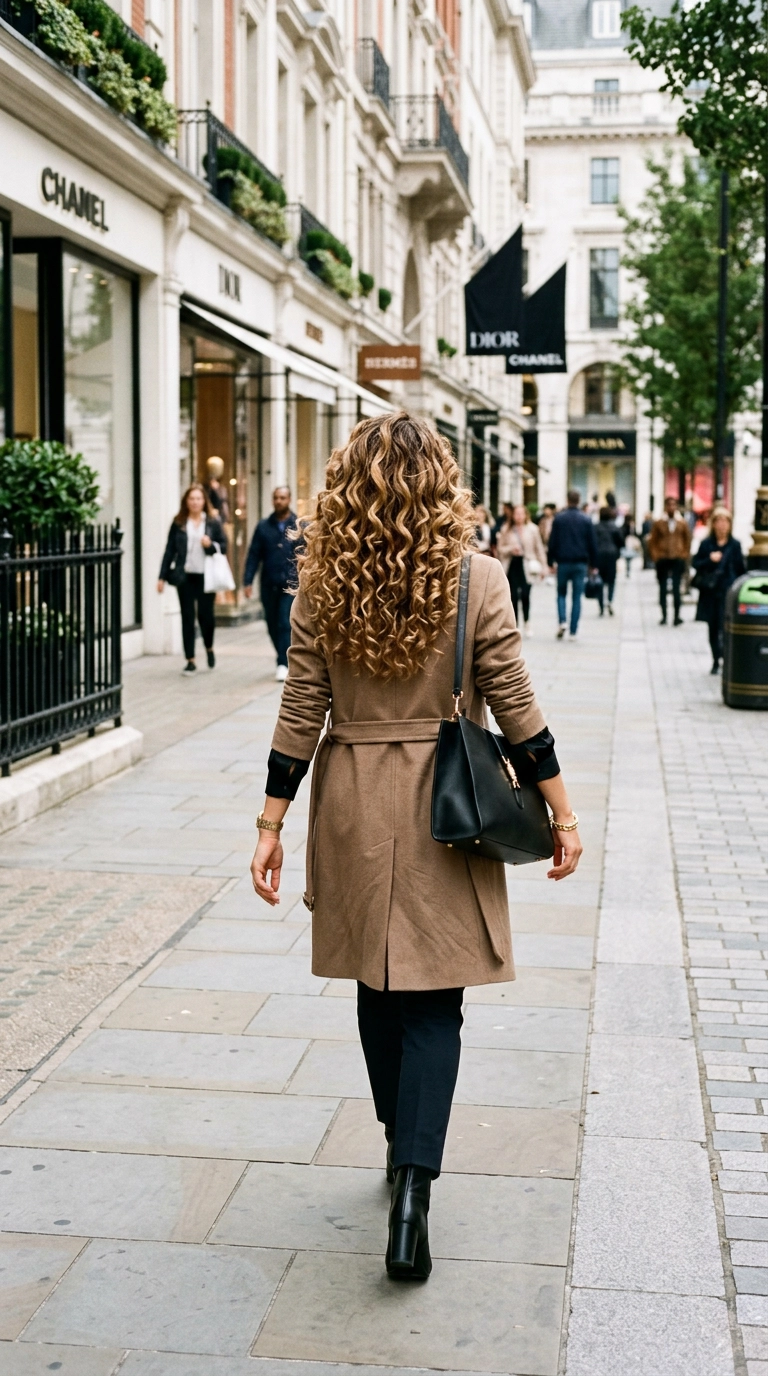
Low Maintenance Caramel Balayage – Effortless Glow Your Brunette Hair Deserves
Finding a hair color that looks expensive but requires very little effort is the goal for many of us with busy schedules. If you have naturally dark hair, the constant cycle of covering gray hair or refreshing highlights can feel like a part-time job you never applied for. Caramel balayage offers a sophisticated solution that focuses on blending rather than blocking out your natural base color.
This hand-painted technique is designed to mimic how the sun naturally lightens hair after a summer spent outdoors. Instead of the harsh lines associated with traditional foil highlights, this method provides a soft, diffused look that grows out beautifully without a visible root line. It is the perfect way to add warmth and dimension to your look without committing to monthly salon visits.
In this guide, we will explore why this specific color palette works so well for different skin tones and how you can achieve a “lived-in” look that lasts for months. Whether you want a subtle shift or a more dramatic contrast, these caramel-inspired ideas will help you communicate exactly what you want to your stylist. Let’s explore how to modernize your brunette base with ease and elegance.
Why Caramel Balayage Is the Smartest Choice for Dark Hair
The primary reason brunettes gravitate toward caramel tones is the natural compatibility of the pigments. Since dark hair naturally has warm undertones, lifting the hair to a caramel shade feels organic rather than forced. You aren’t fighting against your hair’s natural chemistry to achieve a cool platinum; instead, you are working with the warmth that is already there.
Maintenance is where this style truly shines compared to other coloring techniques. Because the color is painted onto the mid-lengths and ends, your natural roots remain untouched or softly blended. This means as your hair grows, there is no “line of demarcation” that screams for a touch-up. Many women find they can go four to six months between professional appointments.
Beyond the logistical benefits, caramel adds a layer of visual health to the hair. Flat, dark hair can sometimes look heavy or dull, especially in winter months. Adding these warmer tones creates the illusion of movement and thickness. The way the light hits the different levels of brown and gold makes the hair appear shinier and more vibrant than a solid single-process color ever could.
- The soft transition allows for a graceful grow-out phase.
- It enhances the natural warmth found in brunette pigments.
- Adding dimension makes fine hair appear thicker and more textured.
- The technique focuses on hair health by leaving the roots untouched by bleach.
The “Lived-In” Aesthetic
The term “lived-in color” is more than just a trend; it is a lifestyle choice for the modern woman. This aesthetic prioritizes a look that seems effortless and relaxed. By keeping the caramel tones away from the very top of the head, you avoid the “striped” look of the early 2000s and instead achieve a sophisticated, sun-kissed finish that looks better as the weeks go by.
This approach also allows for more flexibility with your natural texture. Whether you prefer to wear your hair in its natural state, in a sleek ponytail, or in beachy waves, the caramel pieces will highlight the shape of your cut. It is a versatile choice that adapts to your daily routine rather than forcing you to change it.
Choosing the Right Caramel Shade for Your Skin Tone

Not all caramels are created equal, and selecting the right one depends heavily on your skin’s undertones. Caramel can range from a deep, burnt sugar brown to a bright, honey-gold blonde. Understanding where you fall on the spectrum will ensure the color brightens your complexion rather than washing you out.
If you have a warm skin tone with yellow or golden undertones, you can lean into the richer, honey-based caramels. These shades will harmonize with your skin and give you a healthy, bronzed glow. Think of shades like amber, butterscotch, and warm maple. These colors reflect light beautifully and feel incredibly cozy and inviting.
For those with cool skin tones—meaning you have pink or blue undertones—you should look for “toffee” or “ashy caramel” shades. These have a slightly more neutral base and won’t appear too orange against your skin. A neutral caramel provides enough contrast to be noticeable without clashing with your natural coloring. It is about finding that perfect balance between warmth and coolness.
- Honey Caramel: Best for warm skin tones and dark brown hair.
- Toffee and Oak: Perfect for neutral or cool skin tones.
- Espresso and Dulce de Leche: A high-contrast look for very dark bases.
- Rose-Gold Caramel: A trendy twist for those who want a hint of pinkish warmth.
Matching Your Natural Base
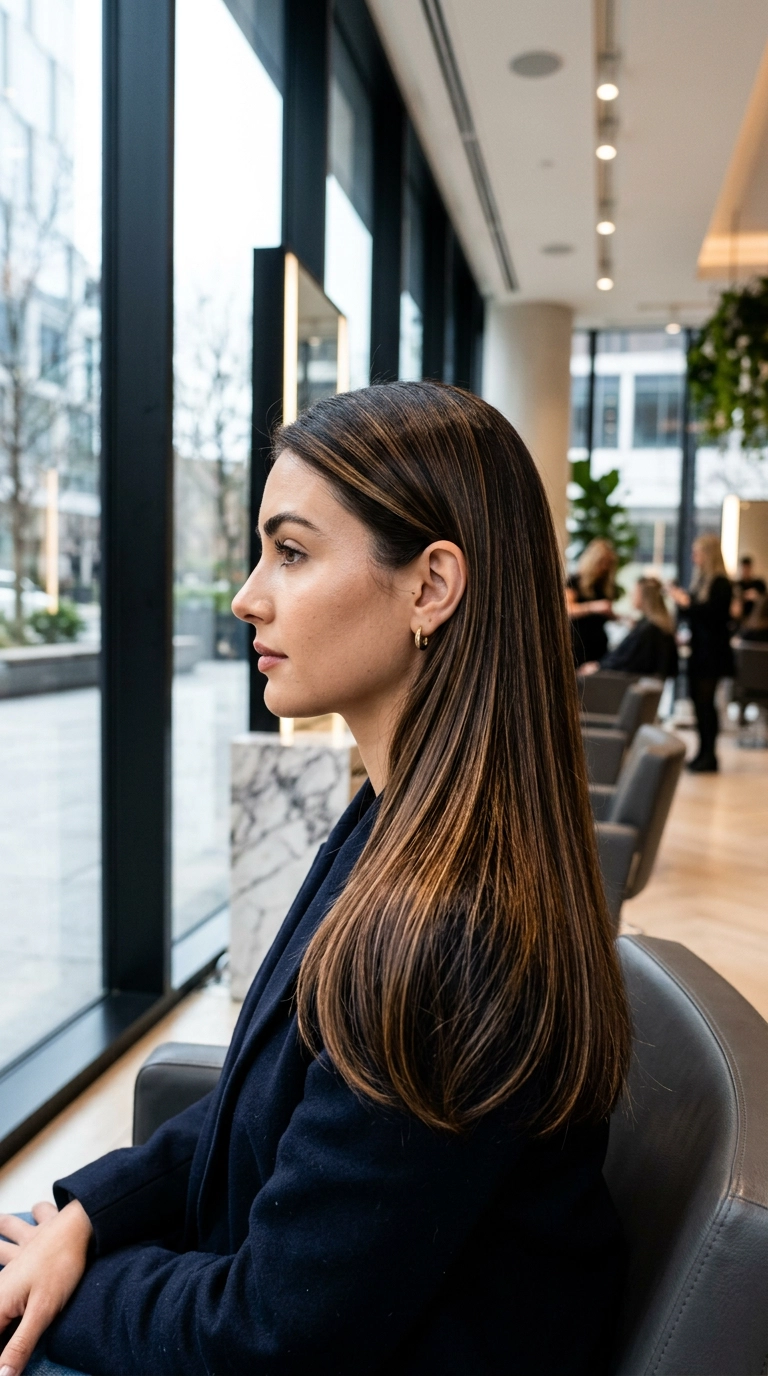
The success of a balayage depends on how well the lighter pieces melt into your base. If you have a very dark, almost black base, you might want to start with a “mocha caramel” to ensure the transition isn’t too jarring. If your hair is more of a medium “mousy” brown, you can go quite light with the caramel pieces to create a “bronde” effect.
Your stylist will often use a “root smudge” or “root tap” to help bridge the gap between your natural color and the new highlights. This involves applying a toner that matches your natural root color just an inch or two down the hair shaft. It creates a seamless gradient that is essential for that signature low-maintenance finish we are looking for.
Modern Styling Ideas to Show Off Your Dimension
Once you have achieved your perfect caramel melt, you want to style it in a way that emphasizes the different tones. The beauty of balayage is that it changes appearance depending on how you manipulate the hair. Because the color is placed strategically, different sections will pop depending on your parting and styling choice.
Soft, undone waves are the gold standard for showing off a balayage. By adding a slight bend to the hair, you allow the light to catch the lighter caramel ribbons as they weave through the darker base. This creates a 3D effect that makes the hair look incredibly dense and healthy. You can achieve this with a large-barrel curling iron or even by braiding damp hair overnight.
If you prefer a more professional or polished look, a sleek blowout is equally effective. When the hair is straightened, the caramel highlights appear as sophisticated “glitter” through the hair. It looks expensive and intentional. For those with shorter brunette bobs, a textured “messy” style can help the caramel pieces frame the face and brighten your features.
- The Face-Framing “Money Piece”: Focus the brightest caramel around the face for an instant lift.
- Beach Waves: Use a sea salt spray to enhance the “sun-kissed” vibe.
- Half-Up, Half-Down: This style shows off the contrast between the dark underside and the light top layers.
- High Ponytail: A sleek updo highlights the seamless blend at the roots.
Textured Braids and Updos
Braids are a secret weapon for anyone with multi-tonal hair. A simple French braid or a fishtail style will look much more intricate when you have caramel highlights. The different colors weave together, making the braid look more detailed and voluminous than it would on solid-colored hair. This is an excellent option for “second-day” hair when you want to look put together with minimal effort.
When pinning your hair up into a bun or a chignon, leave a few caramel-toned tendrils out around the face. This softens the look and ensures the color is visible even when the rest of your hair is pulled back. It’s these small details that make the caramel balayage look so effortlessly chic in any situation.
Essential Maintenance for Long-Lasting Warmth
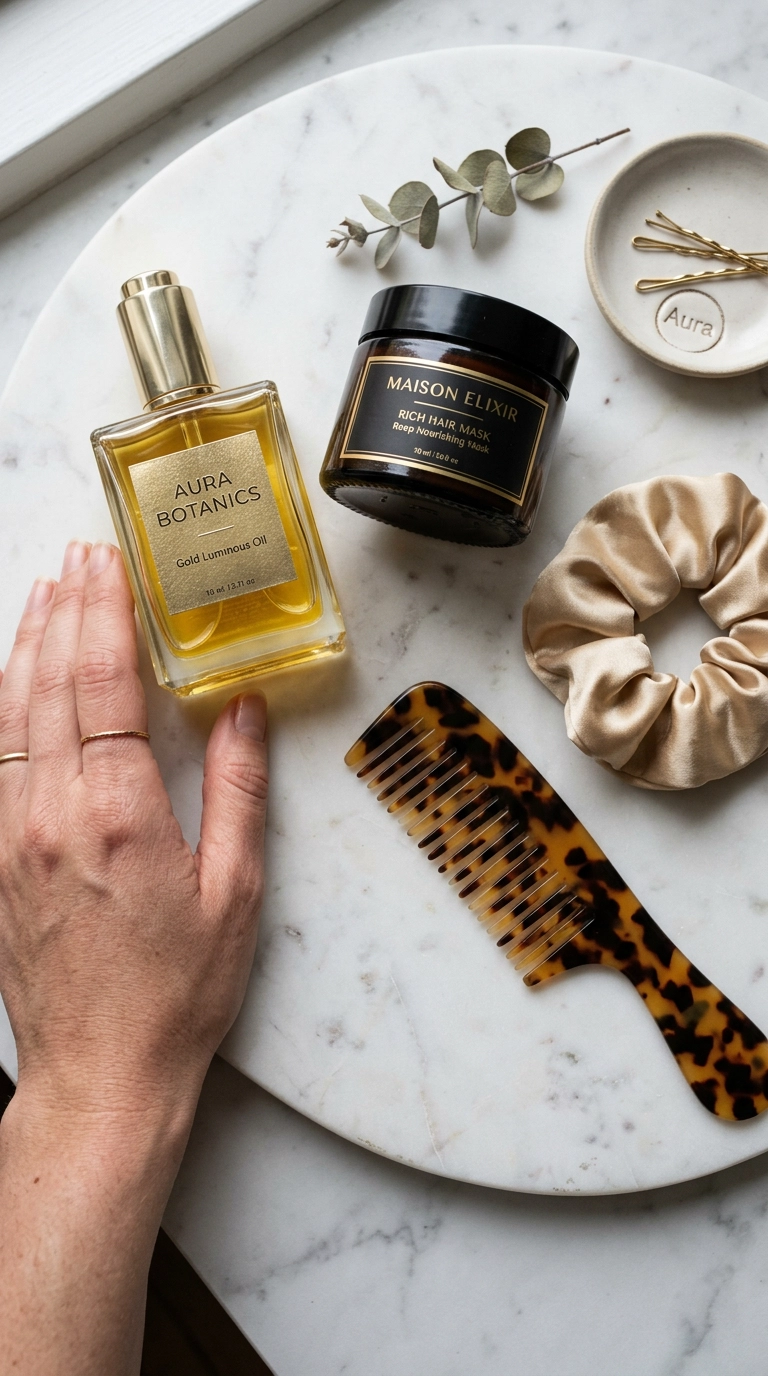
While this is a low-maintenance look, “low” does not mean “no” maintenance. To keep your caramel tones looking fresh and prevent them from turning brassy or orange, you need a simple at-home routine. The goal is to preserve the moisture in your hair and keep the cuticle sealed so the color stays vibrant for as long as possible.
The first step is switching to a sulfate-free shampoo. Sulfates are harsh detergents that can strip away both natural oils and expensive hair color. By using a gentle, color-safe formula, you ensure that your caramel ribbons stay bright. Additionally, because the ends of your hair have been lightened, they will be more porous and in need of extra hydration.
A weekly deep conditioning treatment or a hair mask is non-negotiable. Look for products containing ingredients like argan oil, keratin, or shea butter. These will help repair any minor damage from the lightening process and give your hair that “glass-like” shine that makes balayage look so high-end. Healthy hair reflects light better, which is exactly what you want for those golden tones.
- Use a blue-toned shampoo once every two weeks to neutralize unwanted orange brassiness.
- Apply a heat protectant spray every single time you use a blow dryer or curling iron.
- Incorporate a hair oil on the ends to keep the caramel pieces looking polished and hydrated.
- Rinse with cool water at the end of your shower to seal the hair cuticle.
Toning at Home
If you notice your color starting to fade after a few months, you don’t necessarily need a full salon appointment. Many brands now offer “color-depositing” glosses or masks in caramel or toffee shades. These can be used in the shower to deposit a small amount of pigment back into the hair, extending the life of your color by several weeks. It is a quick and affordable way to keep that “just-left-the-salon” glow.
Also, be mindful of environmental factors. Hard water, chlorine, and excessive sun exposure can all alter the tone of your balayage. If you spend a lot of time outdoors, consider wearing a hat or using a UV-protection spray for your hair. These small preventative measures will save you time and money in the long run.
How to Communicate Your Vision to Your Stylist
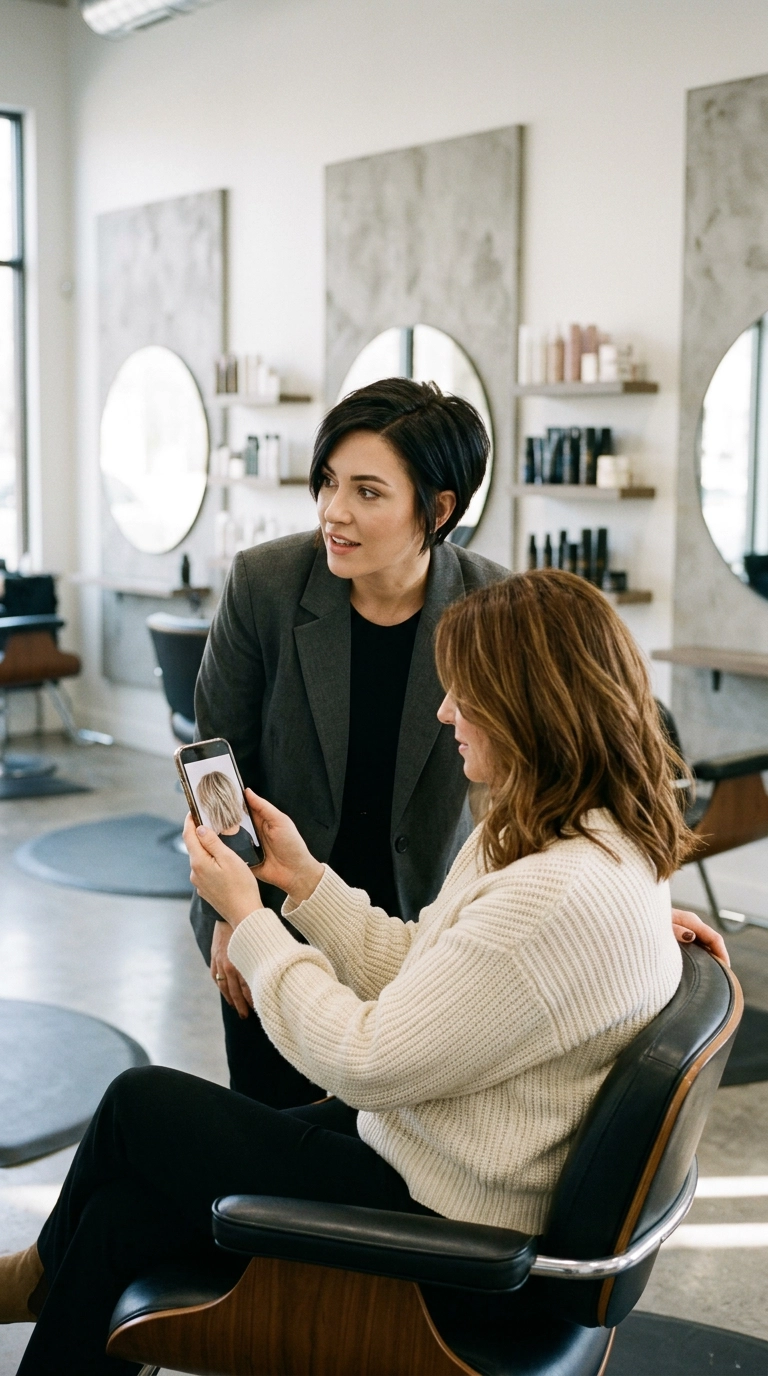
The most important part of getting the perfect caramel balayage is the consultation. “Caramel” means different things to different people. For some, it is a very light blonde; for others, it is a rich reddish-brown. Bringing visual references is the best way to ensure you and your stylist are on the same page.
When looking for inspiration photos, try to find models who have a similar natural base color and hair texture to your own. If you have very dark curly hair, showing a photo of a light-brown straight-haired model might lead to unrealistic expectations. Your stylist needs to see how the color interacts with your specific hair type to give you the best result.
Be specific about where you want the color to start. Do you want it to begin near your cheekbones to highlight your eyes? Or do you want a “melted” look where the color only appears on the bottom third of your hair? Discussing the “placement” is just as important as discussing the “shade.” This clarity will help the stylist determine which technique—be it open-air painting or teasylights—will work best for you.
- Show at least three photos of what you love and one photo of what you hate.
- Ask for a “root smudge” if you want the most low-maintenance grow-out possible.
- Discuss your typical styling routine so the highlights can be placed to suit your natural part.
- Be honest about your hair history, including any previous box dyes or chemical treatments.
The Importance of a Strand Test
If your hair has been previously colored, a strand test is a vital step. This allows the stylist to see how your hair reacts to the lightener before applying it to your whole head. It ensures the integrity of your hair remains intact and that the caramel tone will be achievable. A professional who prioritizes the health of your hair will always appreciate your patience with this step.
FAQs
How long does a caramel balayage appointment take?
Depending on the length and thickness of your hair, you can expect to be in the salon for 3 to 5 hours. This includes the application time, processing, toning, and the final blowout. While it is a significant time investment upfront, the long-lasting results make it well worth the wait.
Will caramel balayage damage my brunette hair?
Any time you lighten hair, there is a potential for some dryness, but balayage is generally much gentler than traditional highlights. Because the lightener is usually not applied to the scalp and often uses a lower volume of developer, the hair stays much healthier. Using professional-grade products during and after the service will minimize any damage.
How often do I need to go back to the salon?
Most women with this style return every 4 to 6 months for a full refresh. However, you might want to stop by every 8 to 10 weeks for a quick “gloss and trim” to keep the color vibrant and the ends healthy. This “mini” appointment is much shorter and more affordable than the initial color service.
Can I get caramel balayage if I have gray hair?
Yes, but the approach is slightly different. Your stylist will likely perform a “root retouch” to cover the grays first, and then apply the balayage over the top. The caramel pieces can actually help camouflage future gray growth by creating a more broken-up color pattern rather than a solid dark block.
Is caramel balayage suitable for short hair?
Absolutely. While it is often seen on long hair, it looks incredible on bobs and lobs. On shorter hair, the placement is even more critical to avoid a “patchy” look. Your stylist will focus on fine, delicate pieces that add movement to your specific cut.
Choosing a caramel balayage is an investment in your confidence and your time. It offers a bridge between the dark richness of your natural brunette roots and the playful brightness of sun-kissed highlights. By selecting the right shade for your skin tone and committing to a simple hydration-focused routine, you can enjoy a high-end, editorial look that fits perfectly into a busy, modern lifestyle. It is time to embrace the warmth and let your hair shine with a glow that looks as natural as it feels.